Today, Evergreen webinars have gained much popularity, primarily due to their ability to provide ongoing value and flexibility to both creators and viewers.
Basically, an evergreen webinar is a pre-recorded webinar that can be replayed and accessed by viewers at any time, as opposed to a live webinar that happens once only, and in real-time! It’s amazing in a way that you don’t have to worry about time zones and your audiences.
What is the Evergreen Webinar Funnel? How to use it as a Lead Magnet?
We all are aware that webinar works pretty strong as lead magnet. Evergreen webinar funnel is a marketing strategy that ensures that you have steady leads you have planned to acquire. You can’t have this facility while conducting a live webinar. It doesn’t generate a continuous stream of new leads.
See Also: What is the Difference between Live Webinar vs Automated Webinars
The evergreen webinar funnel will follow mostly the below mentioned steps.
Setting up an Evergreen Webinar
The funnel starts with creating high-quality videos of whatever the subject of your webinar is! Properly structure, create, and record a video for your evergreen webinar!
This webinar will focus on providing valuable information to your viewers, addressing commonly experienced pain points, and going on to showcase the benefits of your product or service!
A webinar may also include presentations, demonstrations, case studies, and testimonials to highlight or portray the idea that you want to convey through this webinar video. There are various types of webinar formats you can try according to your goal.
Scheduling A Webinar
Once you have recorded a video for continuous playback on your pre-scheduled webinar timelines, you need to configure and set the webinar playback event at certain fixed intervals for your viewers. This is called Automated Scheduling of your evergreen webinar!
Evergreen webinars are designed to be scheduled for running at various intervals throughout the day or even across an entire week! This makes evergreen webinars accessible to viewers or attendees from different time zones, as per their convenience and availability!
Constructing a Landing Page for your Webinar
Once you have the video for the webinar and the schedules ready, you must design and create a landing page that speaks about the content of your webinar, what it is about, and when your audience will be able to attend it.
For that, you need to create a landing page with lucid descriptions, and enticing visual elements that draw more viewers to your evergreen webinar.
Apart from promoting your evergreen webinar, this landing page should also include a registration form, which provides potential viewers options to fill in their details when signing up to attend your webinar. Remember to design this page such that it can capture their contact information, allowing you to build your email list, for later on and follow up with them.
Automating Email
Much before the scheduled dates of hosting the webinar, you should implement an automated email follow-up or communication process with the viewers who signed up through the landing page.
After these users sign up, you may, or rather should, remind them about your upcoming evergreen webinar, relevant content, and any other information that engages the participants and encourages them to attend it unfailingly.
Hosting Your Webinar
Once the day and time of making your evergreen webinar live arrives, your registered users will be redirected to the dedicated page from where they can watch the pre-recorded webinar!
Calling Attendees into Action
Once the webinar is live with the pre-registered attendees viewing it, you may set some ‘Call To Action’ events such as promotional ‘Click-Throughs’, polls, or surveys, or even ask for inputs or questions (which you may later answer via direct email), etc.
Strategically placed calls to action, such as signing up for a trial, purchasing a product, or booking a consultation, will help achieve your primary aim for organizing and hosting a webinar. Some of these can also be placed at the end of the webinar, along with some unique, ‘one-time opportunity’ promotional offers, etc., for your viewers!
See Also: 13 Essential Webinar Survey Questions
Following-Up Afterwards
Much of the action between the host and the attendees takes place after the webinar ends. You can customize and create additional automated follow-up emails, which include a replay of the webinar, and additional resources (ebooks, guides, etc.), to attendees as well as non-attendees!
If you do have any more incentives that would entice the viewers or attendees to ‘take action’ (such as evergreen offers!), you can send these too via emails soon after the webinar ends.
Analytics and Optimization
Since webinars are lead magnets, their utility is vastly gained from using analytics tools specifically designed to leverage the data captured from an evergreen webinar’s funnel. Be clear on your webinar kpis and metrics.
The captured data facilitates marketers in understanding, which parts of the funnel are effective, and which need further improvisations! Newer funnels can be designed with optimizations learned from all such captured data and analysis results, thereby leading to better conversion rates.
How to Set Up Your Evergreen Webinar with WebinarPress?
Now we go online to WebinarPress.com, our evergreen webinar platform for today, and see how easy it is to set up your own Evergreen Webinar in just a few steps!
Step 1:
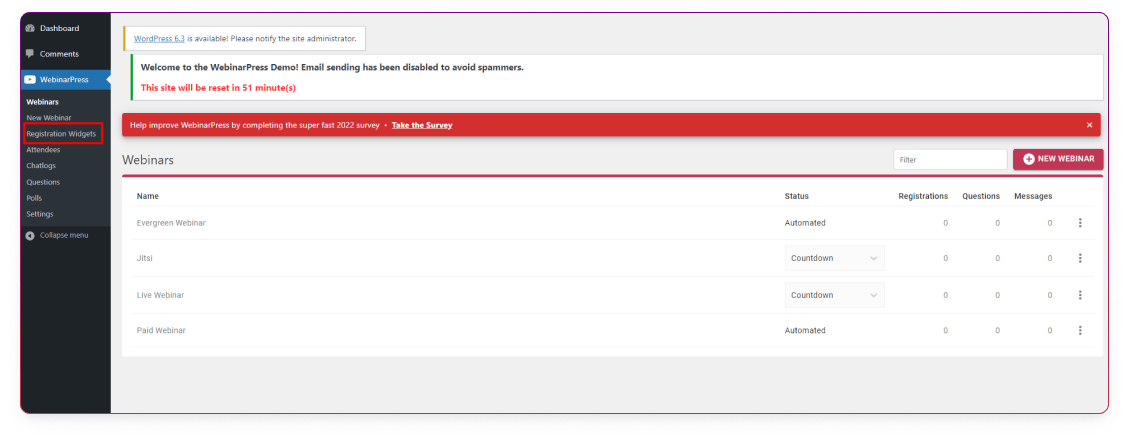
Once you have created your login or logged in using your credentials, you will see the main Dashboard with a certain section in vertical order on the left of the screen. The main center of the screen will show options according to the section you have clicked and selected on the left.
Firstly, the WebinarPress section will be displayed with a button named “+ New Webinar” on the right side of the screen.
Step 2:
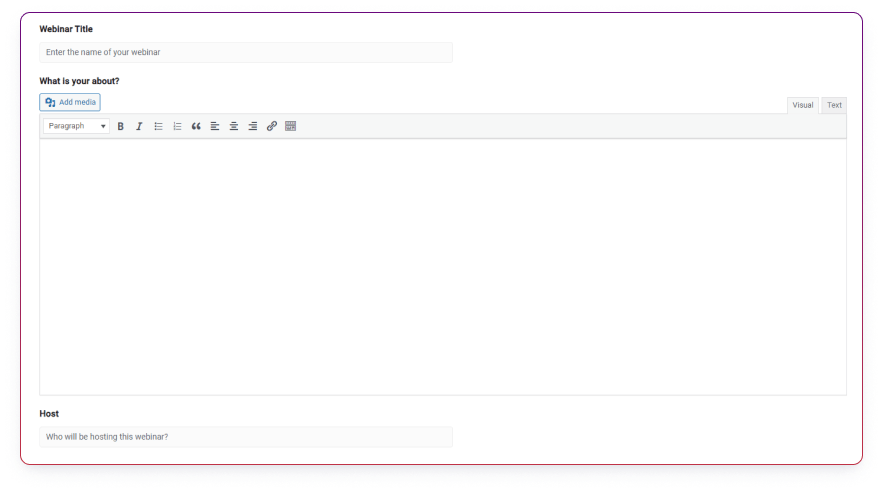
You can begin by adding a few details, such as the title of the webinar, some details of the subject or topic in the About box, and the name of the person who will be hosting the webinar. Highlight the fact that it’s an “evergreen” presentation. We’ll come back to this page after setting up some more details on a few pages as follows.
Step 3:
On the right side, you can see various options such as Registration, Confirmation, Countdown, Webinar, and Replay in the tall vertical column. Clicking on each will take you to different sections that will allow you to set various details and data for the webinar.
Step 4:
For example, in the Registration section, you can create a page with details that are required from visitors, such as the name & email ID of the individual, and any other details that you need using the custom field button underneath.
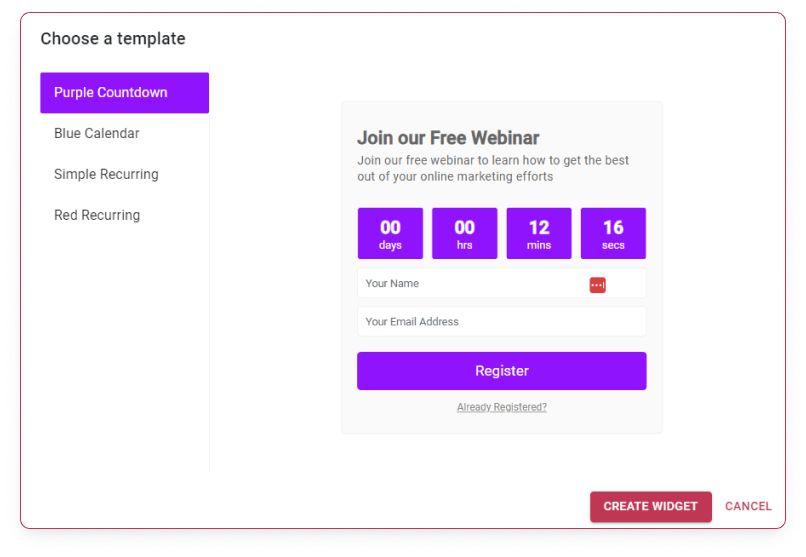
You can also choose to keep it password protected for the viewer to log into the webinar, limit the number of attendees per telecast of the webinar, as well as also design a custom registration page. Or, you can go to the registration widgets and create your registration form directly from the readymade template.
Step 5:
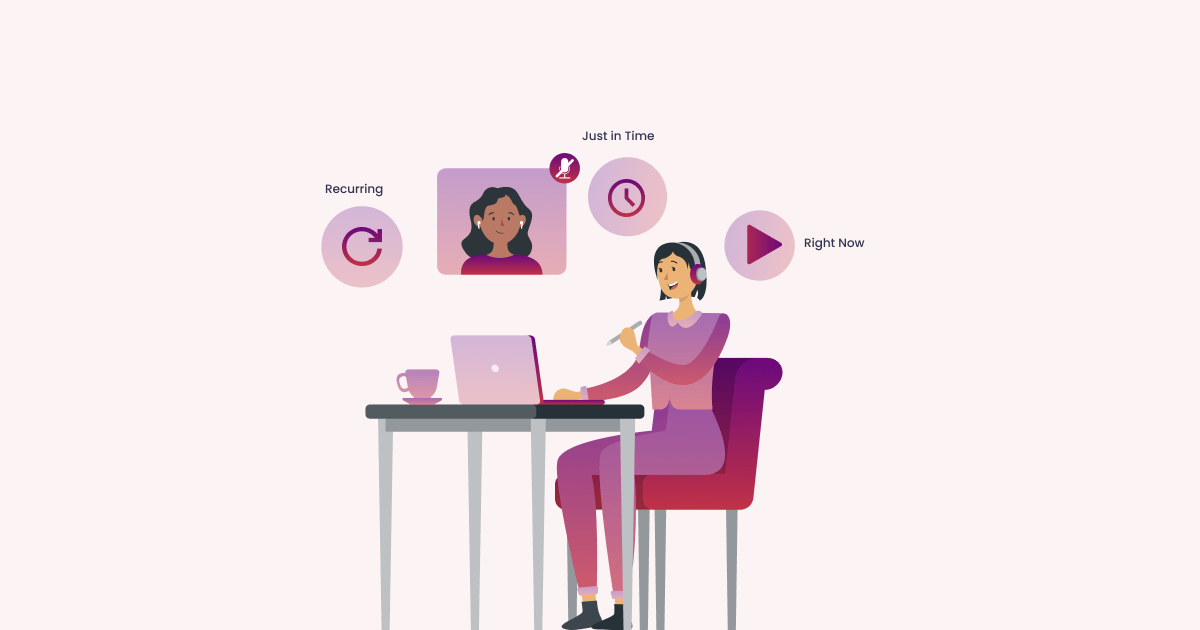
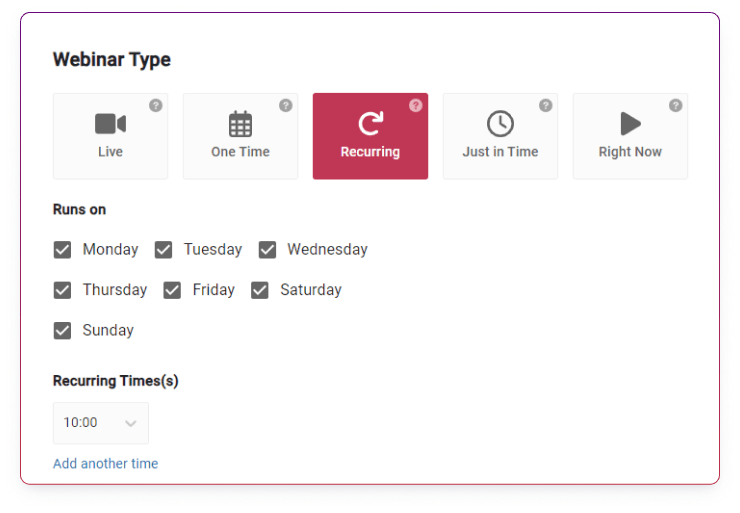
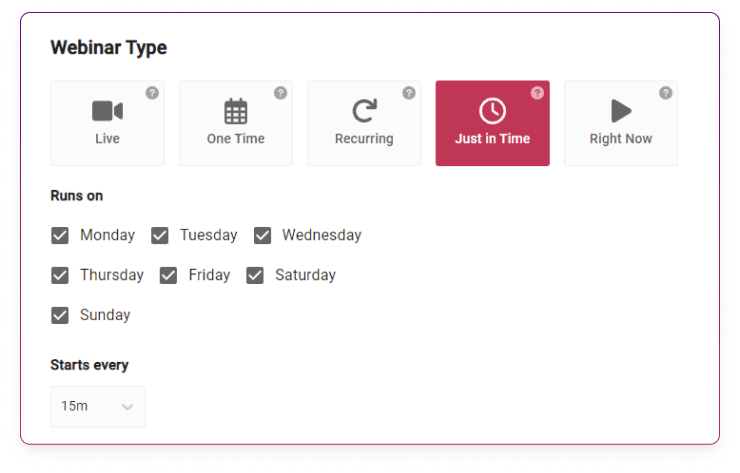
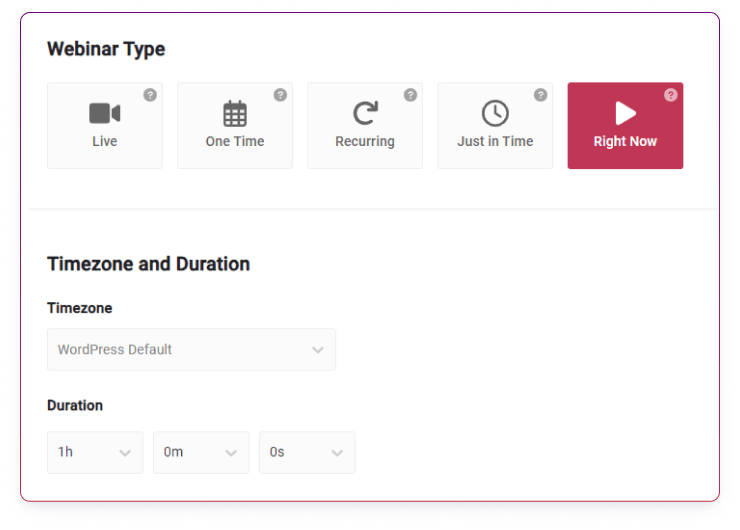
Scroll down halfway on the Setup page, and you will see that there are 5 options displayed under the type of webinar. ‘Live’, ‘One Time’, ‘Recurring’, ‘Just in Time’, and ‘Right Now’. You don’t have to worry about the “live” option, as this is an evergreen webinar.
Select, ‘Recurring’, ‘Just in time’ or “Right Now’ webinar as per your webinar preference.
- Evergreen webinars can be run in 3 different ways from the above list of 5. ‘Recurring’, ‘Just in Time’, and ‘Right Now’ are modes of running an evergreen webinar.
- ‘Recurring’ mode allows you to set the days of the week, and the time at which the webinar will begin running. You can select one through seven days of the week, and add more than one unit of time at which the webinar will begin.
- ‘Just in Time’ provides you with similar options, such as Recurring, except for 1 primary difference. Instead of a preset time at which the webinar will begin, Just in Time gives you an option of running the webinar at preset intervals of time, in increments of 5 minutes of time.
Say, for example, your webinar is 10 minutes long; thereby, you can set it to run every 15 mins, giving a space of 5 minutes between each webinar scheduled to run.
- The ‘Right Now’ mode allows you to instantly start a webinar, making it on demand, for the host to select the video file and begin telecasting the evergreen webinar.
Step 6:
Make your pick, and scroll down a bit. Set the time zone and the duration for which the webinar will run. The duration you set must be longer than the length of the video you recorded or edited, and have created. Speaking of which, you need to have uploaded this video to any of the most popular video-sharing websites online, such as YouTube, Vimeo, Twitch, Wistia, Zoom, etc.
After which, paste the URL of your video as it appears in the browser, from where you have uploaded it. That’s It! You’re all set to make live the evergreen video as per your whims and fancy!
Step 7:
At the bottom of the page, you can choose to either enable or disable charging the attendees for viewing your webinar, and set the price for the webinar too! Make sure you set up your WooCommerce first.
Here is the link to the Free Demo of the Plugin; you can try it and get an idea of how the webinar works.
Conclusion
The key characteristic of an evergreen webinar is that it can be scheduled and replayed multiple times without becoming outdated. Thus, allowing businesses, educators, and other content creators to maximize the reach of their webinars without having to constantly host live events.
Instead, they can create a high-quality webinar recording, which can include presentations, demonstrations, discussions, and other engaging content. Then, this recording is made available to viewers on a scheduled basis or upon request.
Evergreen webinars are particularly useful for scaling content distribution and engagement, as they can reach a larger audience without the constraints of scheduling live events. They also provide viewers with the flexibility to watch the webinar at their convenience. Overall, evergreen webinars are a strategy that blends the benefits of live interaction with the convenience and scalability of pre-recorded content.
