A few weeks ago, YouTube released a new functionality that makes it possible to stream video with a minimum delay through their platform using the WebRTC technique. Compared to other streaming solutions which are/were offered by Youtube, this has huge potential and on top of that, it’s free to use (at the time I’m writing this tutorial).
At this moment, it’s only possible to share your webcam video and audio using the WebRTC solution from Youtube, but let’s wait and see what the future brings. If you need to share your screen or show a presentation during the broadcast then I would still advise using one of the other streaming functionalities from Youtube which we are describing here in our documentation.
In this 4-minute video tutorial I will guide you through it, and show you how you can use this new feature within your own website using WP WebinarSystem.
Steps you need to take:
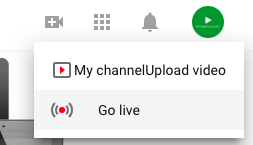
As soon as you are logged into your YouTube channel, click on the webcam icon on the upper right corner of the page. Within the dropdown menu select the option “Go Live”. You can also use this link to go live directly: https://www.youtube.com/webcam

Youtube will prompt you to insert a name + description for your stream, and you can configure the video and audio source. You can also configure if you want this to be a public stream or an unlisted one. As soon as you have configured these settings, click on ‘next’. You have 3 seconds before an automatic snapshot of your webcam will be made, which will be used as the thumbnail of your stream.
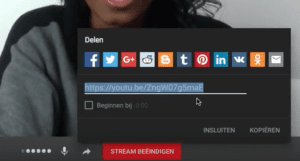
Right after that, your stream is live, and you are ready to share it on your webinar page. Click on the share icon (the arrow to the right), to open the share options of this stream. You can find this button at the bottom center of the Youtube streaming window.
The following section will open, and you can copy the URL it shows you. It’s a direct link to the stream.
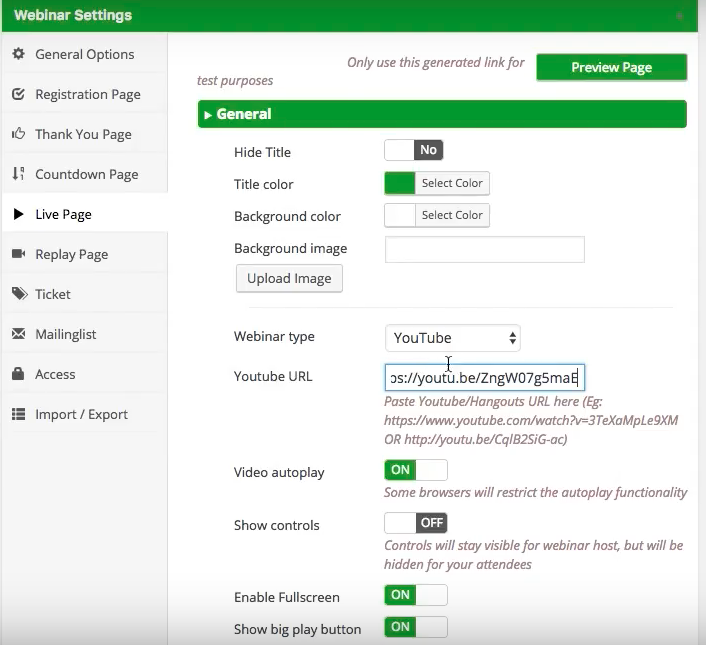
Within the settings of your webinar on your WordPress website, there is a section where you can paste the URL. Go the the ‘Live page’ option tab and look for the ‘webinar type’. Make sure this is set to ‘Youtube’, and paste the link below in the ‘YouTube URL’ input field shown here:
If you have configured all the settings to your wishes (autoplay, non-clickable player, etc.), then you can save the page for your attendees to see your webinar within your own WordPress website.
Want to try this out yourself? Then download the Lite version of WP WebinarSystem, which you can use for free to conduct live webinars. And with the help of this tutorial, you can stream with a minimal delay for free combining Youtube Live and the WP WebinarSystem plugin.
Are you in need of more functionalities? Like selling webinar tickets, being a non-clickable player, organizing member webinars, or conducting automated webinars? Then the Pro version is what you are looking for.
» Click here to start with the Pro version of WP WebinarSystem
Do you have any questions or comments? We would love to hear from you! Please leave a comment on this post, or send us an email.


