If you are using shortcodes to generate a registration form for your webinar, you would probably notice that there is no styling on the output of the forms. If your theme has default form styling configured, then the registration form will adjust to the styling of your own WordPress theme. But if your theme doesn’t have form styling configured (or you don’t want to use the default styling of your theme), then you can add your own CSS.
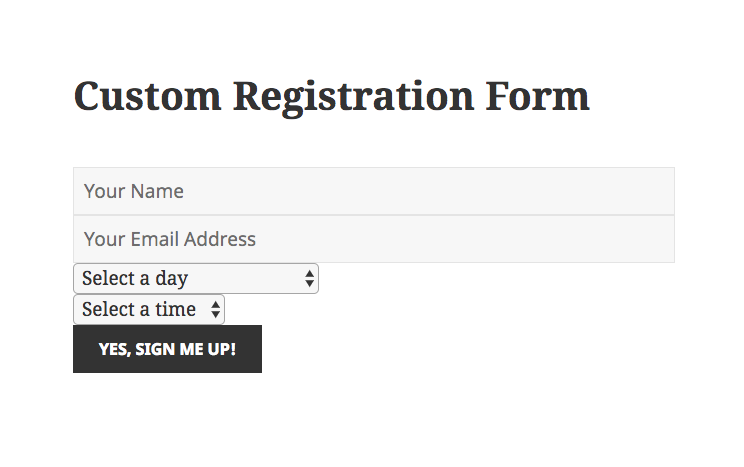
In this tutorial, I am using the ‘Twenty Fifteen’ WordPress theme. You can see an example of the output of my shortcode for the registration form:
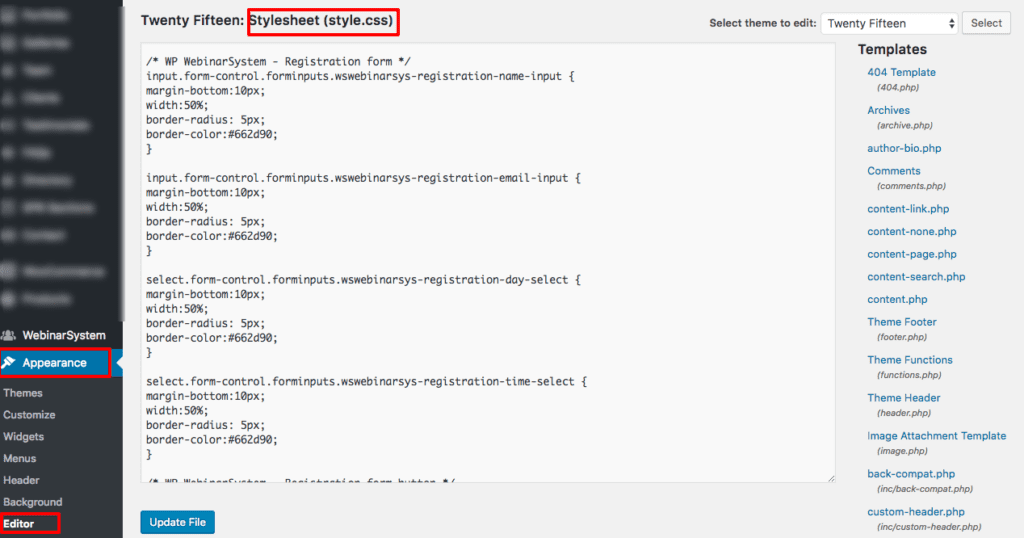
To adjust the style of the output, you can add custom CSS in the stylesheet (style.css file) of your theme, or in any other ‘custom css’ field your theme offers on a settings page at the backend of your WordPress website. If you have ‘administrator’ access to your website, then you can open the editor, and place the CSS code directly within your (child)theme’s stylesheet like this:
We have added CSS classes to specific elements of the form. If you want to adjust the style of the input fields, then add the following class to your theme’s style.css file. You can adjust this example to your own needs and/or add different values so it will match your wishes.
/* WP WebinarSystem - Registration form */
input.form-control.forminputs.wswebinarsys-registration-name-input {
margin-bottom:10px;
width:50%;
border-radius: 5px;
border-color:#662d90;
}

input.form-control.forminputs.wswebinarsys-registration-email-input {
margin-bottom:10px;
width:50%;
border-radius: 5px;
border-color:#662d90;
}
If your webinar is automated, then there also is a dropdown for the date and time to choose from. You can adjust this with the following CSS:
select.form-control.forminputs.wswebinarsys-registration-day-select {
margin-bottom:10px;
width:50%;
border-radius: 5px;
border-color:#662d90;
}

select.form-control.forminputs.wswebinarsys-registration-time-select {
margin-bottom:10px;
width:50%;
border-radius: 5px;
border-color:#662d90;
}
If you want to adjust the button, and the color when you hover over it, then use the following CSS class:
/* WP WebinarSystem - Registration form button */
button.forminputs.wswebinarsys-registration-submit-btn {
color: #fff;
background-color:#662d90;
border-radius: 5px;
width:50%;
}

button.forminputs.wswebinarsys-registration-submit-btn:hover {
color: #fff;
background-color: #009900;
border-radius: 5px;
width:50%;
}
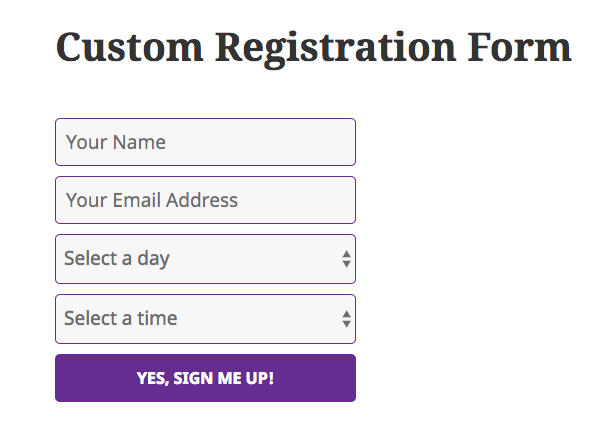
Below you will see the “after” result when I publish the example CSS code from this tutorial. Again, for this example, I used the ‘Twenty Fifteen’ theme. Depending on your theme style, you will receive the same results.
You can also customize the output of the login shortcode. Use the following classes for this:
/* WP WebinarSystem - Login form */
input.form-control.forminputs.wswebinarsys-login-email-input {
margin-bottom:10px;
}

/* WP WebinarSystem - Login form button */
button.forminputs.wswebinarsys-login-submit-btn {
color: #fff;
background-color:#662d90;
}

button.forminputs.wswebinarsys-login-submit-btn:hover {
color: #fff;
background-color: #009900;
}
You can use the custom CSS on both the Lite and Paid version, but the styling for the dropdown options will only work if you are using the Pro version since you can only conduct automated webinars with WebinarPress.
Have fun customizing!


