So you want to make a list where you can show all of your upcoming webinars? No problem!
There are two ways to achieve this at the moment, and it depends on the manner in which you want your upcoming webinars listed within your WordPress website.
The Automated Way – Using Webinar Widgets
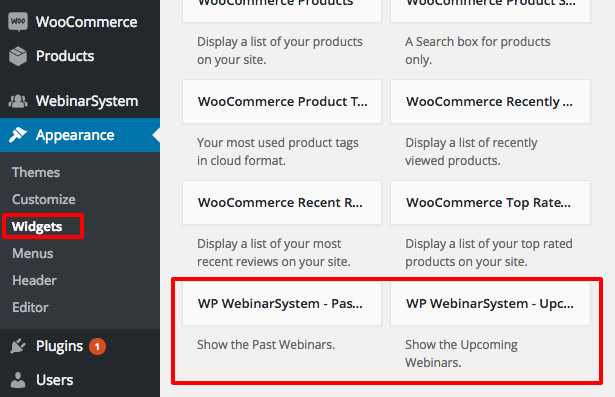
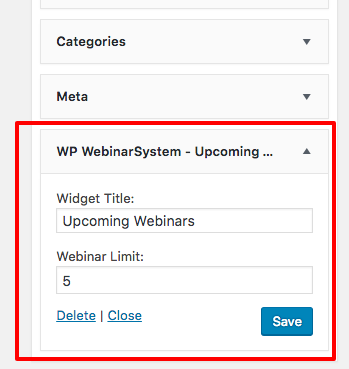
The first way to achieve this is to use the ‘upcoming webinars widget’. You can add the “upcoming webinars” widget within the widget menu from your backend.
For example, see this picture:
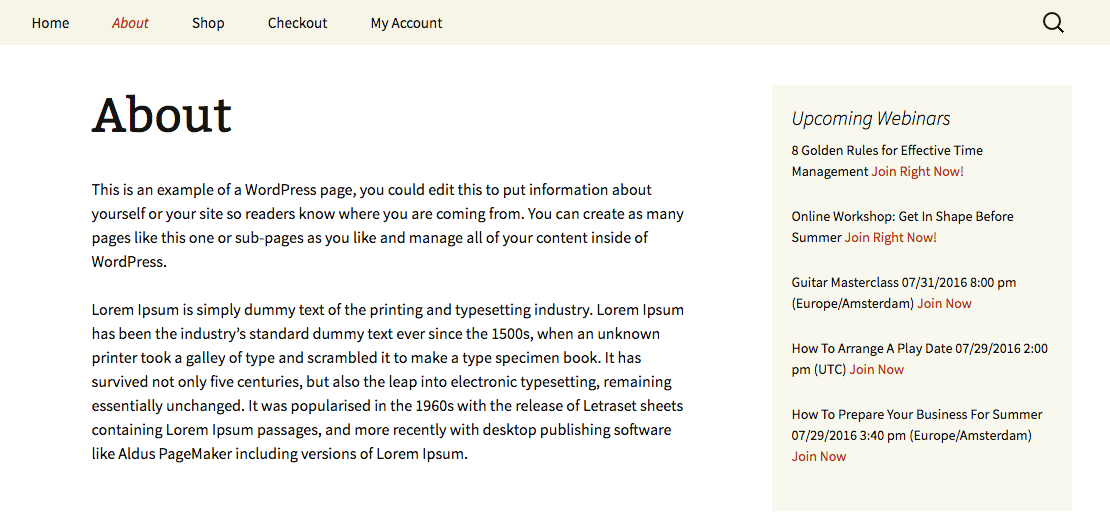
You can choose how many webinars you would like to show in the widget area on your page. The webinars will be automatic sorted and displayed depending on the status of the webinar. In this example there is a list of upcoming webinars in the sidebar of the page:
The best part of this method is that the webinar list will be updated automatically. You don’t have to insert new webinars or timeslots manually. Awesome!
The Manual Way – Using Shortcodes
The other way is to create a separate page with shortcodes where you can manually list the webinars in the future. Go to the backend of your WordPress website and create a new page. Give the page a title, for this example; we are going to name it ‘Upcoming Webinars’.
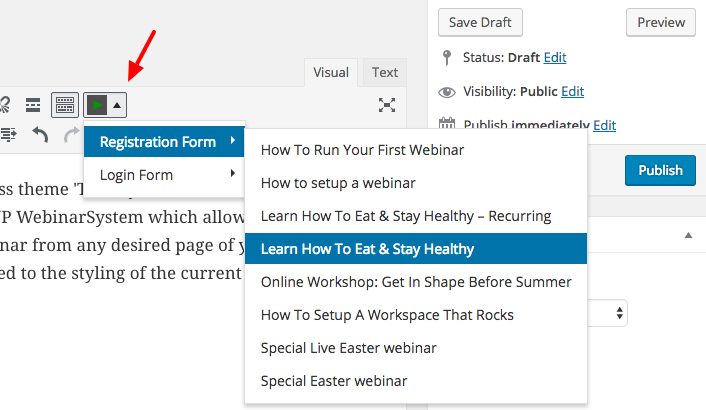
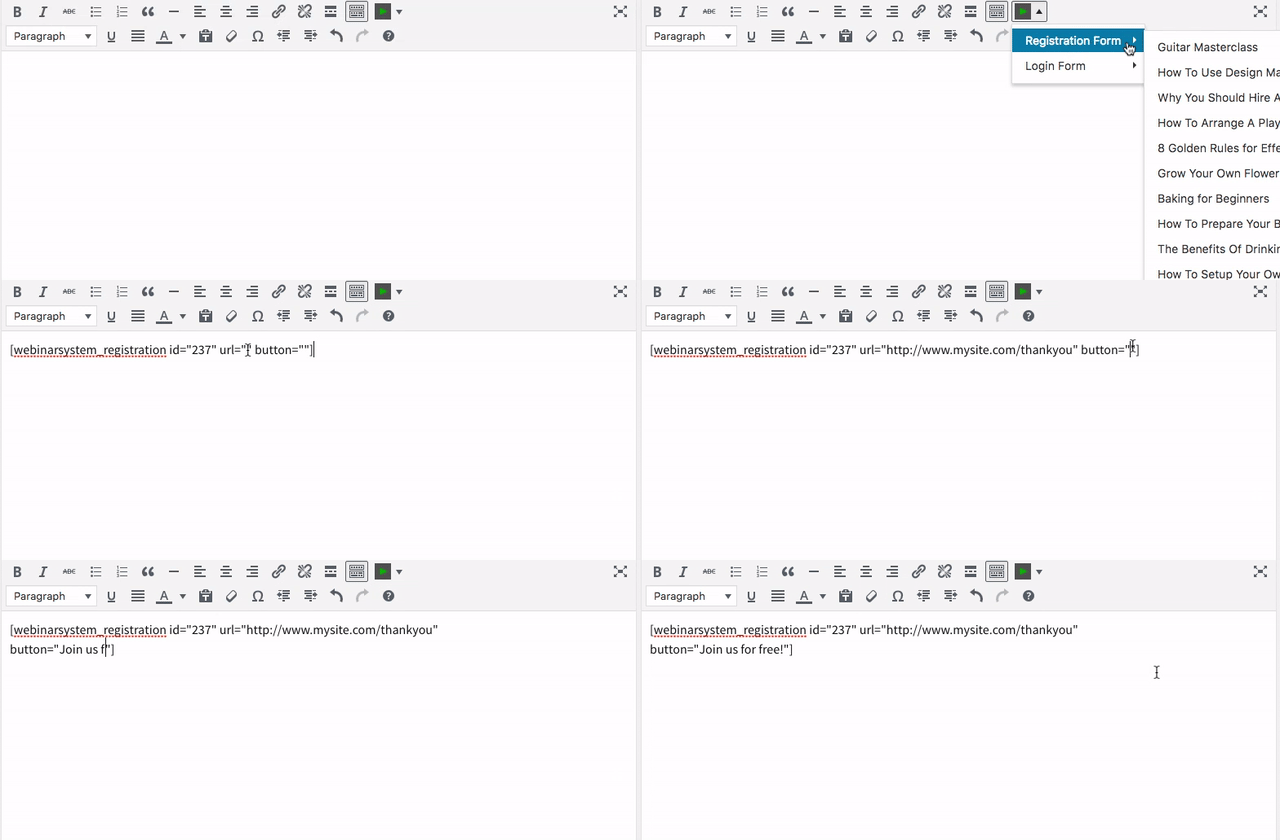
You can style the page to your desire, and write on it about the webinar that you like. To insert the shortcode on the page, click on the WP WebinarSystem icon in the text editor. Then select “registration form” and click on the webinar in which you want to list the registration form.
After you have selected the webinar you want to list on your page, there will be a shortcode inserted into your text editor. With this shortcode, you can adjust certain functionalities of the registration form. In this example, the following shortcode appears in my browser:
This is the default output, which basically says that it will show the registration form for the webinar with ID 237 (the ID of the webinar will be automatically inserted for you). If I leave the other parameters “URL” and “Button” in the shortcode empty, then it will behave like normal. After your website visitor has registered, he/she will stay on your “upcoming webinars” page, and there will be a thank you message for signing up.
If I do adjust the shortcode, then I can add a button text and a URL. The button text is by default what you have configured as the text for the button on the default registration page. If for any reason, you want to show a different text message on the register button, then you can add this here.
I can also adjust the shortcode by adding a URL to it. This will be the URL (link) where the website visitor will be redirected to after signing up. This can be a custom confirmation page where you say ‘Thank you’ for signing up. You can also redirect to an incentive; an upsell or any other form of redirect you think is necessary.
There is no styling on the output, so the form will adjust to the styling of your WordPress theme. You can also add your CSS.
This listing method is great when you are conducting automated and recurring webinars, and you want to dedicate a page to it in your branding. You only will have to set this up once, and don’t have to adjust the time of the recurring webinars manually. The date and timeslots of the webinar will be adjusted automatically within the registration form outputted by the shortcode.
Of course, it’s also possible to list live webinars with this method, but then you would have to remember to add or remove webinars in time, so your page won’t be outdated.
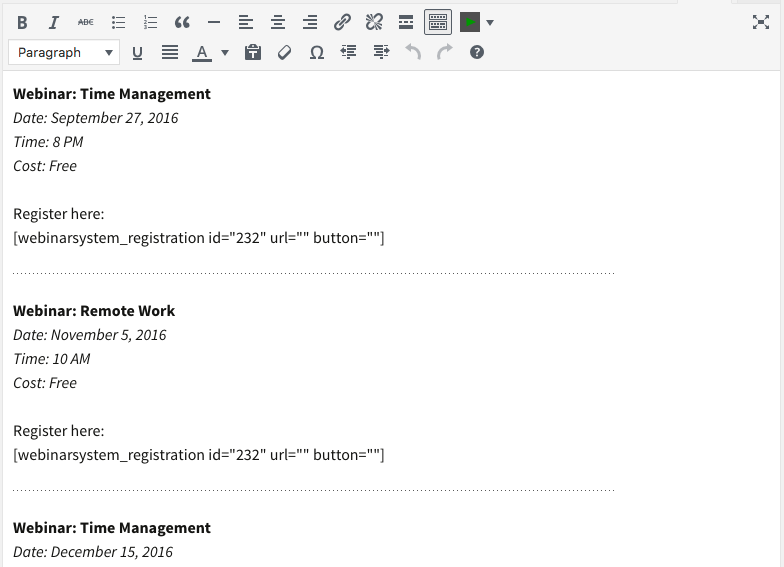 Creating your upcoming webinars list in the backend |
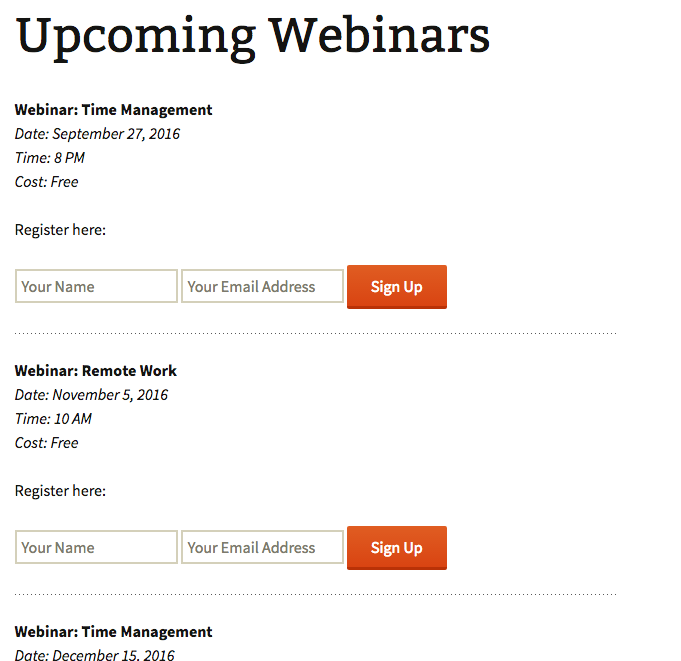 The output of your creation on the frontend of your website |
When you are working with a page builder plugin (for example – Visual Composer, Divi or Beaver Builder), it gives you the functionality to create an awesome ‘upcoming webinars page’ without any design skills. You only have to paste the shortcode(s) where you want the registration form to show up, and you are good to go!
The widgets are only available in the Pro version of WP WebinarSystem. The shortcodes, however, are available in both the free Lite version and Pro version.
I hope you find this tutorial useful and found the inspiration to create your own page with upcoming webinars. When you do, don’t hesitate to show it off by leaving a comment below this tutorial. We can learn from each other and maybe other readers of this tutorial are interested in the content of your webinar also!
Have fun!
Regards,
Lucy

